Single Post Generation is the focus of this documentation page. Generate a complete post with title, sections, content, and excerpt in a guided workflow. Follow the sections below to configure the feature and use it in your WordPress workflow.
Generate a complete WordPress post — title, structured content with headings, and excerpt — through a three-step plan-based wizard: topic, editable plan, then draft.
Navigate to SmartyPress AI → Content Generation and open the Single Post tab.
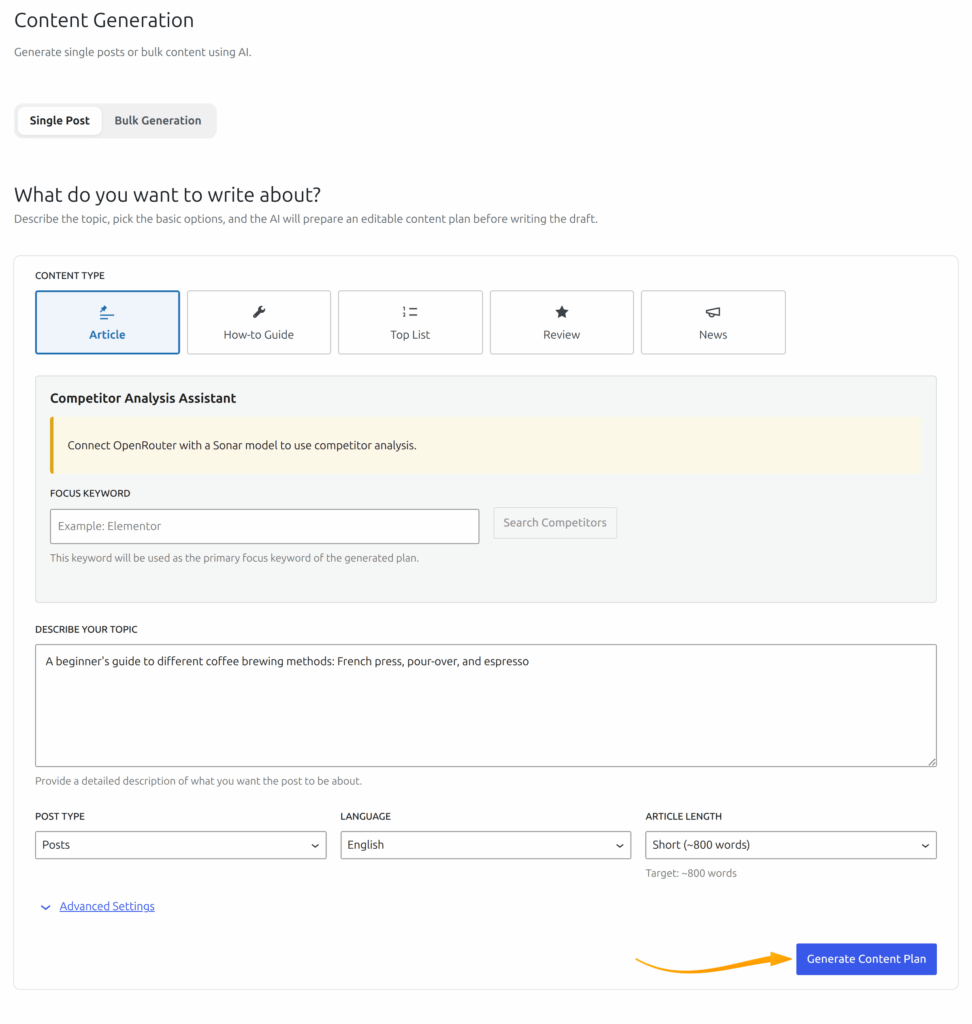
Step 1: Topic and Settings
The topic screen asks “What do you want to write about?” and collects the inputs used to build an editable content plan:
- Content Type — tile selector for the plan prompt: Article, WooCommerce Product (when the
productpost type is available), How-to Guide, Top List, Review, News - Competitor Analysis Assistant (optional) — when the SEO Analysis module is enabled, this block appears above the topic field so you can research a focus keyword and pass selected headings/keywords into plan generation
- Describe your topic — the main subject and brief for the AI
- Post Type — Post, Page, Product, or any enabled custom post type
- Language — output language (or a custom language name)
- Article Length — Short (~800 words), Medium (~1500 words), Long (~2800 words), or a custom word count
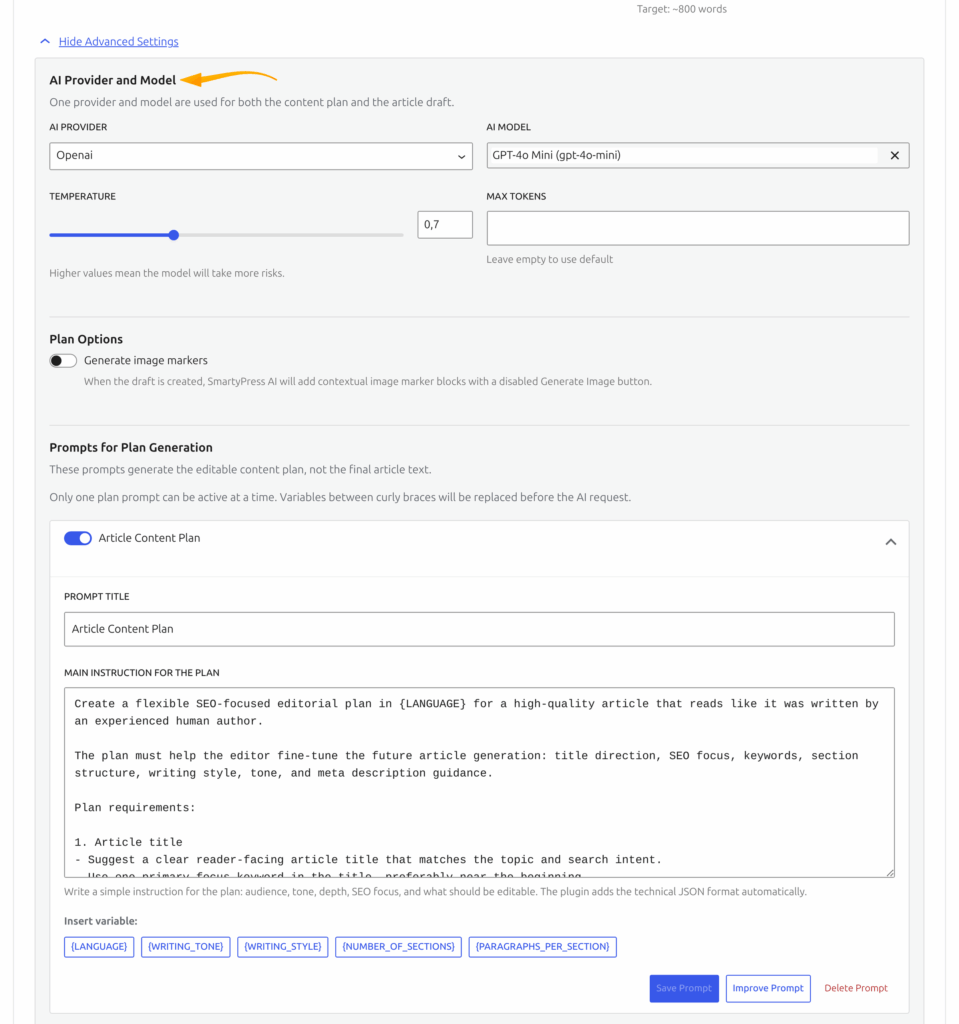
Expand Advanced Settings to override provider, model, temperature (default 0.7), max tokens, optional image markers, and the plan prompt templates.
Click Generate Content Plan to continue.
Step 2: Review the Content Plan
AI prepares an editable plan before writing the article. On Review Article Plan you can:
- Edit the article title, meta description, primary keyword, and secondary keywords
- Reorder sections and adjust each section heading, goal, notes, keywords, and target word count
- Ask the AI to change the plan via Plan Instructions and Apply to Plan
- Click Regenerate Plan to rebuild the outline from the same topic
When the outline looks right, click Generate Article.
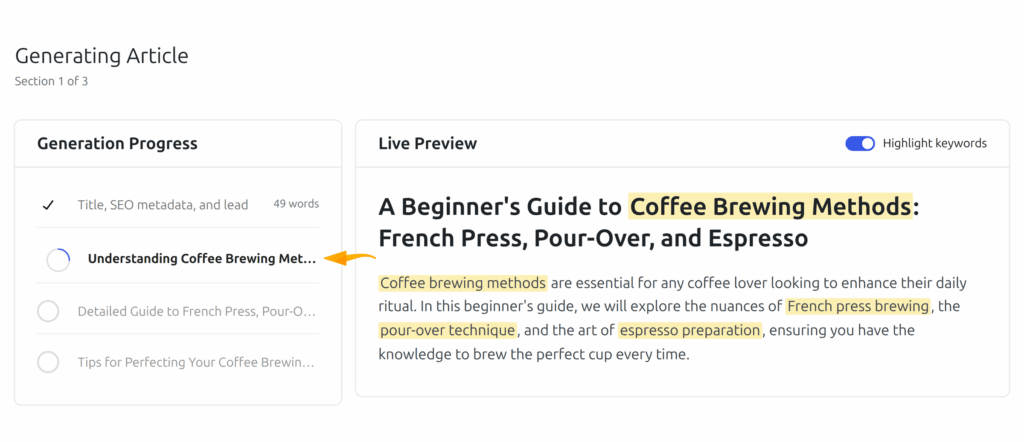
Step 3: Draft Preview and Save
The draft step generates the article section by section with a live preview:
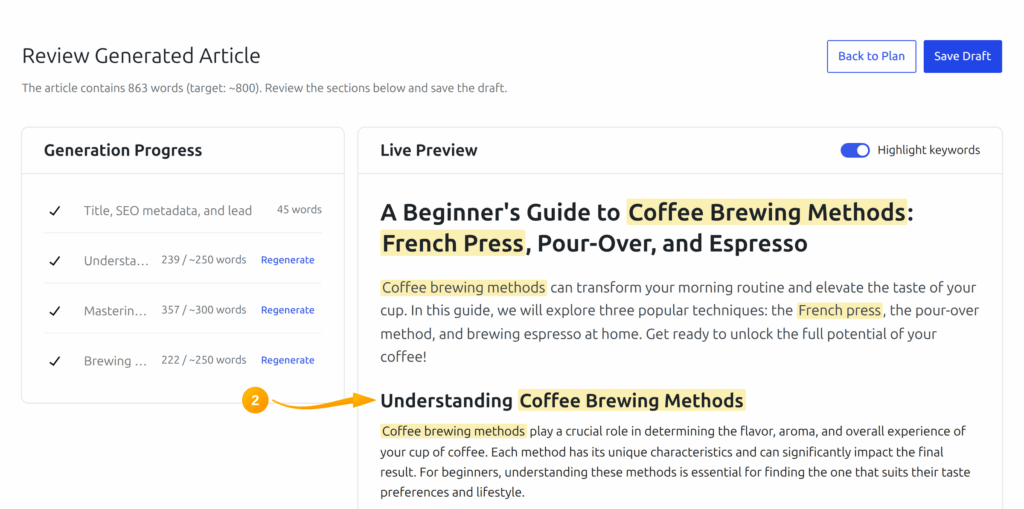
- Title, SEO metadata, and lead
- Each planned section as structured blocks
You can regenerate or retry individual sections, then click Save Draft. The post is created as a draft, and a success dialog offers View Post or Continue Generation.
Custom Plan Prompts
In Advanced Settings → Prompts for Plan Generation, edit the prompt templates that build the content plan (not the final article body). Built-in templates match the Content Type tiles. Use variables such as {LANGUAGE}, {WRITING_TONE}, {WRITING_STYLE}, {NUMBER_OF_SECTIONS}, and {PARAGRAPHS_PER_SECTION}. See Prompt Variables and Customization for the full list.
Single Post Generation Workflow Checklist
The single post generation workflow should be treated as a repeatable process, not a one-time setting. Start by confirming that the SmartyPress AI Engine module related to this page is enabled, then check the default provider, model, language, and post type settings before you run the feature on production content. This keeps generated output predictable and makes it easier to compare results between OpenAI, DeepSeek, OpenRouter, Yandex GPT, and GigaChat.
Use this checklist whenever you document, test, or train another editor on Single Post Generation. It helps keep the setup aligned with WordPress permissions, Rank Math SEO fields, and the editorial workflow used by your site. If a result looks different from what you expected, repeat the same checklist with a smaller prompt and a lower temperature before changing global settings.
- Confirm that the required SmartyPress AI module is enabled in the Components screen.
- Open Settings and verify that the selected provider has a valid API key and a tested connection.
- Choose the model that fits the task: fast models for drafts, premium models for final marketing copy, and web-search models for research.
- Review the output language, temperature, max tokens, and prompt variables before generating content.
- Save the result as a draft first, then review headings, links, facts, and SEO fields before publishing.
Recommended Settings
For most single post generation tasks, start with a balanced model such as GPT-4o Mini, GPT-4o, DeepSeek Chat, or a carefully selected OpenRouter model. Keep temperature around 0.5 to 0.8 for documentation and tutorials, because these pages need clarity more than experimentation. Increase temperature only when you need more creative headlines, introductions, or alternative wording.
Use a clear default language and keep prompt variables consistent across articles. For documentation pages, a neutral or professional writing tone usually works best. If the generated result is too short, increase the article length preset (or custom word count) rather than asking the model to “write more” after the fact. Structured settings create more stable output and make Single Post Generation easier to reproduce later.