Settings Overview covers plugin configuration: AI providers, default model and language, enabled post types, prompt variables, debugging, plus the related Components and Logs screens.
The Settings page centralizes provider credentials and global defaults. Module toggles and API log browsing live on their own admin routes.
Navigate to SmartyPress AI → Settings (#/settings) to access the main options.
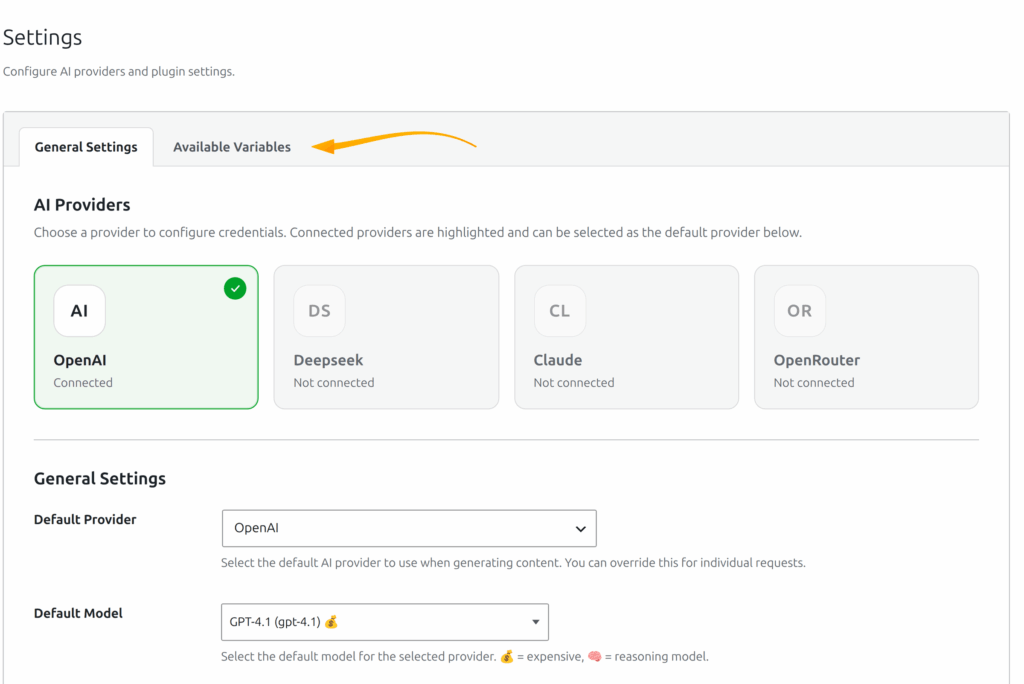
Settings Tabs
The Settings page has two tabs:
- General Settings — provider cards, default provider/model/language, enabled post types, and debug options
- Available Variables — reusable prompt variable values inserted into prompt templates
Providers Section
On the General Settings tab, open a provider card to configure API credentials:
- OpenAI — API key, proxy toggle, proxy URL
- DeepSeek — API key
- Claude (Anthropic) — API key
- OpenRouter — API key, enabled text models, enabled image models
- Yandex GPT (ru_RU only) — OAuth token / API key, Folder ID, model
- GigaChat (ru_RU only) — Authorization Key, scope, model, SSL
There is no separate Test Connection button. When you click Save Provider Settings, the plugin saves the credentials and automatically tests the connection. A successful test marks the provider as connected; a failed test keeps it disconnected and shows the error.
General Settings
| Setting | Default | Description |
|---|---|---|
| Default Provider | openai | Which provider to use by default |
| Default Model | (provider-dependent) | Default model for the selected provider |
| Default Language | Use site language | Language for AI output; empty = use site locale |
| Enabled Post Types | Posts, Pages, Products | Which post types have AI features enabled |
Available Variables
On the Available Variables tab you can configure standard values such as writing tone, writing style, number of sections, and paragraphs per section, plus custom variables. See Prompt Variables and Customization for details on {WRITING_TONE}, {WRITING_STYLE}, {NUMBER_OF_SECTIONS}, {PARAGRAPHS_PER_SECTION}, and custom tokens.
Modules
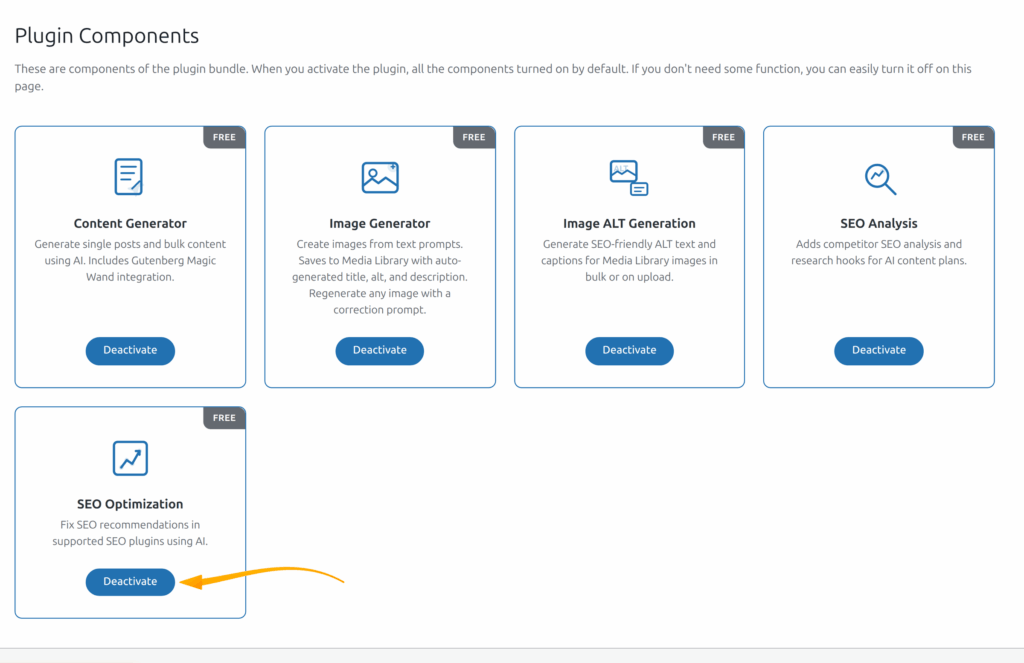
SmartyPress AI Engine includes 5 modules. Enable or disable each one independently on the Components page:
- Content Generator — content generation features and Magic Wand
- Image Generator — image creation from text prompts (DALL-E, GPT Image, YandexART)
- SEO Optimization — AI-powered fixes for SEO plugin recommendations inside Gutenberg
- Image ALT Generation — bulk ALT text, captions, and descriptions for Media Library images
- SEO Analysis — Competitor Analysis Assistant and research hooks for content plans
Disabled modules are completely unloaded — no admin pages, no scripts, no REST routes.
Post Types
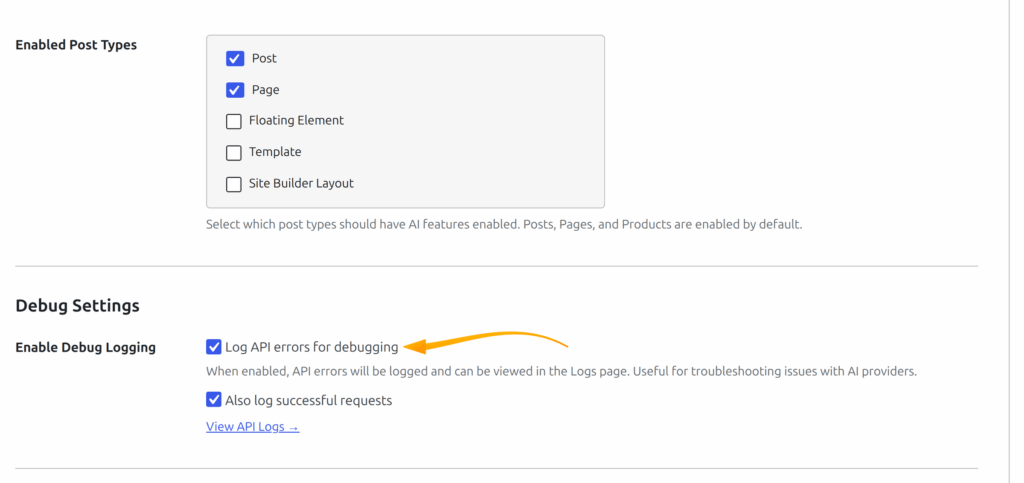
Select which post types have AI features enabled under General Settings → Enabled Post Types. Default: Posts, Pages, Products (if WooCommerce is active).
Components Page
Navigate to SmartyPress AI → Components (#/components) to manage modules. The page title is Plugin Components. Each module card shows its name, description, and an Activate / Deactivate button:
- Toggle modules on or off without leaving the page.
- See module descriptions and build badges at a glance.
- Changes take effect immediately — disabled modules are fully unloaded, and the admin sidebar updates after refresh of the modules context.
Logs Page
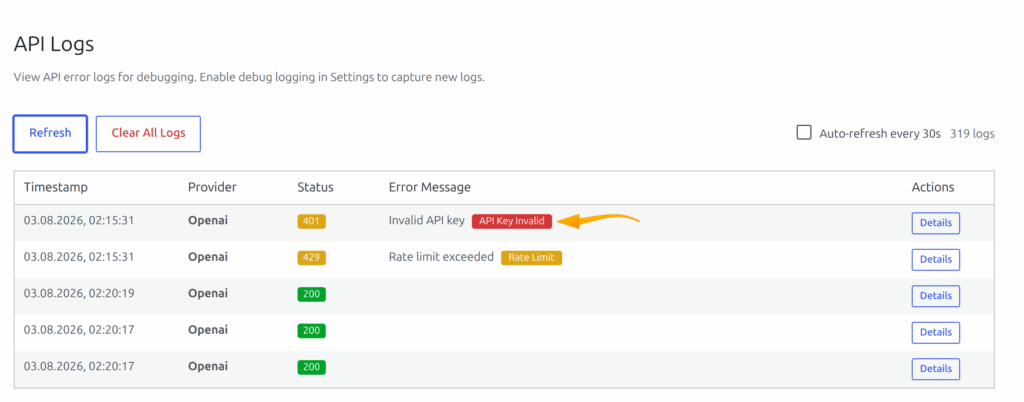
Navigate to SmartyPress AI → Logs (#/logs) to browse API request logs. The page title is API Logs.
- Enable debug logging first under Settings → Debug Settings.
- Use Refresh to reload entries, or enable Auto-refresh every 30s.
- Open Details on a row to inspect the full request/response payload.
- Use Clear All Logs to delete stored log files.
- Columns include Timestamp, Provider, Status, and Error Message.
Token Usage Dashboard
The plugin tracks API token consumption and estimated costs across providers and models on the Dashboard (#/dashboard):
- Token Usage Widget — usage over a selectable period (7 / 14 / 30 days) with a daily breakdown chart.
- Cost Estimation — approximate cost per request based on model pricing.
- Per-Model Breakdown — see which models consume the most tokens.
- Auto-Cleanup — usage records older than 90 days are automatically deleted.
Token usage data is available via REST API at /token-usage/stats.
Debug & Logging
On Settings → General Settings, open the Debug Settings block:
- Enable Debug Logging — checkbox label Log API errors for debugging
- Also log successful requests — appears after debug logging is enabled
- View API Logs → — link to
#/logs
Logs are stored in wp-content/uploads/smartypress-ai-logs/ and automatically cleaned after 7 days.
Settings Overview Workflow Checklist
Treat settings setup as a repeatable checklist before running AI features on production content. Confirm providers, defaults, modules, and logging so results stay predictable across OpenAI, DeepSeek, Claude, OpenRouter, Yandex GPT, and GigaChat.
- Open Settings and save each provider you need — connection is tested automatically on save.
- Set Default Provider, Default Model, Default Language, and Enabled Post Types.
- Review Available Variables for tone, style, and section defaults.
- Open Components and activate only the modules you need.
- If troubleshooting, enable Debug Logging and inspect entries on the Logs page.